Concepts
Prompt engineering is one the core pillars of LangSmith. While traditional software application are built by writing code, AI applications often involve a good amount of writing prompts. We aim to make this as easy possible by providing a set of tools designed to enable and facilitate prompt engineering.
Why prompt engineering?
A prompt sets the stage for the model, like an audience member at an improv show directing the actor's next performance - it guides the model's behavior without changing its underlying capabilities. Just as telling an actor to "be a pirate" determines how they act, a prompt provides instructions, examples, and context that shape how the model responds.
Prompt engineering is important because it allows you to change the way the model behaves. While there are other ways to change the model's behavior (like fine-tuning), prompt engineering is usually the simplest to get started with and often provides the highest ROI.
We often see that prompt engineering is multi-disciplinary. Sometimes the best prompt engineer is not the software engineer who is building the application, but rather the product manager or another domain expert. It is important to have the proper tooling and infrastructure to support this cross-disciplinary building.
Prompts vs Prompt Templates
Although we often use these terms interchangably, it is important to understand the difference between "prompts" and "prompt templates".
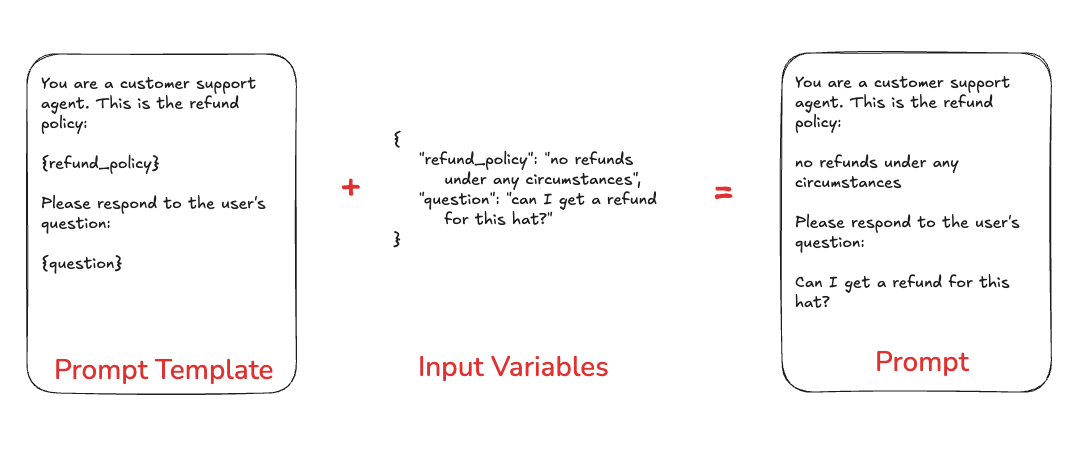
Prompts refer to the messages that are passed into the language model.
Prompt Templates refer to a way of formatting information to get that prompt to hold the information that you want. Prompt templates can include variables for few shot examples, outside context, or any other external data that is needed in your prompt.
Prompts in LangSmith
You can store and version prompts templates in LangSmith. There are few key aspects of a prompt template to understand.
Chat vs Completion
There are two different types of prompts: chat style prompts and completion style prompts.
Chat style prompts are a list of messages. This is the prompting style supported by most model APIs these days, and so this should generally be preferred.
Completion style prompts are just a string. This is an older style of prompting, and so mostly exists for legacy reasons.
F-string vs mustache
You can format your prompt with input variables using either f-string or mustache format. Here is an example prompt with f-string format:
Hello, {name}!
And here is one with mustache:
Hello, {{name}}!
Mustache format gives your more flexbility around conditional variables, loops, and nested keys. Read the documentation
Tools
Tools are interfaces the LLM can use to interact with the outside world. Tools consist of a name, description, and JSON schema of arguments used to call the tool.
Structured Output
Structured output is a feature of most state of the art LLMs, wherein instead of producing raw text as output they stick to a specified schema. This may or may not use Tools under the hood.
Structured outputs are similar to tools, but different in a few key ways. With tools, the LLM choose which tool to call (or may choose not to call any); with structured output, the LLM always responds in this format. With tools, the LLM may select multiple tools; with structured output, only one response is generate.
Model
Optionally, you can store a model configuration alongside a prompt template. This includes the name of the model and any other parameters (temperature, etc).
Prompt Versioning
Verisioning is a key part of iterating and collaborating on your different prompts.
Commits
Every time you save a new version of a prompt, it is saved with a new commit. You can view old commit, allowing you to easily see previous prompt versions in case you need to revert to previous functionality. You can access a specific commit of the prompt in the SDK by specifying a commit alongside the prompt name.
Tags
You may want to tag prompt commits with a human-readable tag so that you can refer to it even as new commits are added. Common use cases include tagging a prompt with dev or prod tags. This allows you to track which versions of prompts are used where.
Prompt Playground
The prompt playground makes the process of iterating and testing your prompts seamless. You can enter the playground from the sidebar or directly from a saved prompt.
In the playground you can:
- Change the model being used
- Change prompt template being used
- Change the output schema
- Change the tools available
- Enter the input variables to run through the prompt template
- Run the prompt through the model
- Observe the outputs
Testing multiple prompts
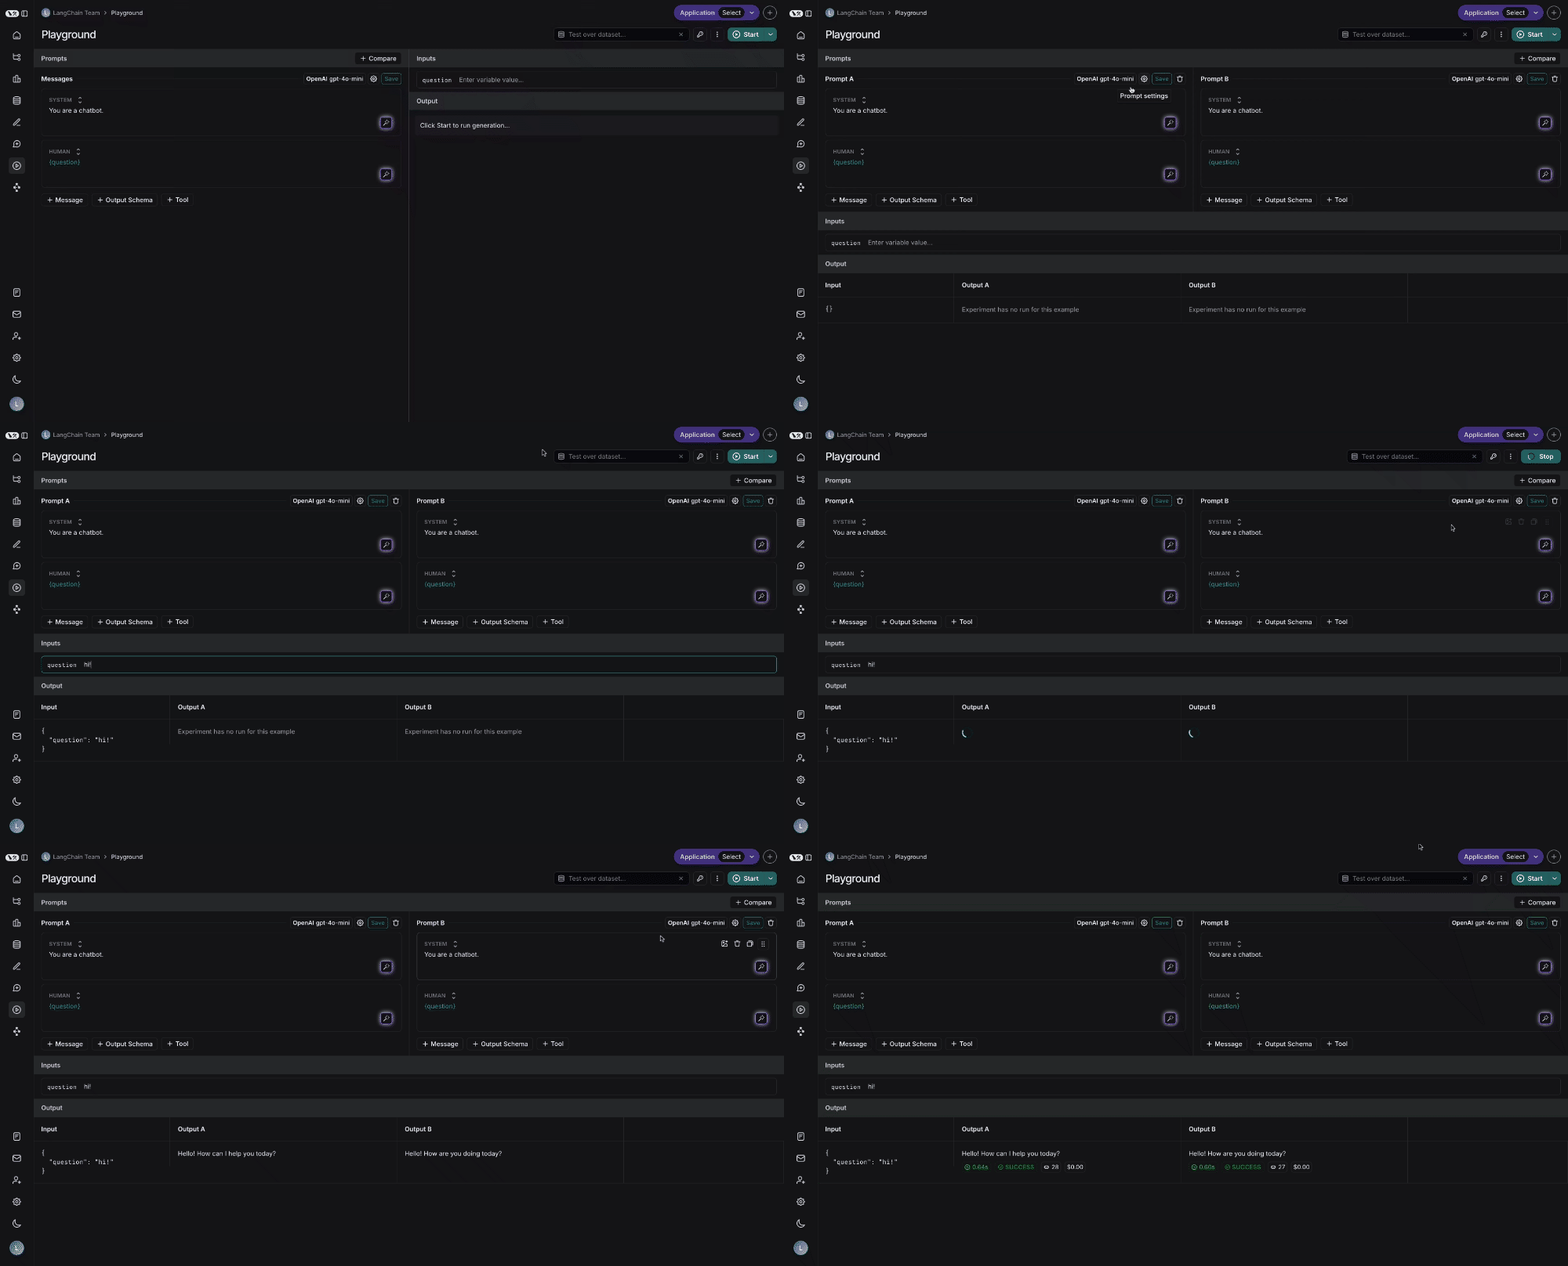
You can add more prompts to your playground to easily compare outputs and decide which version is better:
Testing over a dataset
To test over a dataset, you simply select the dataset from the top right and press Start. You can modify whether the results are streamed back as well as how many repitions there are in the test.
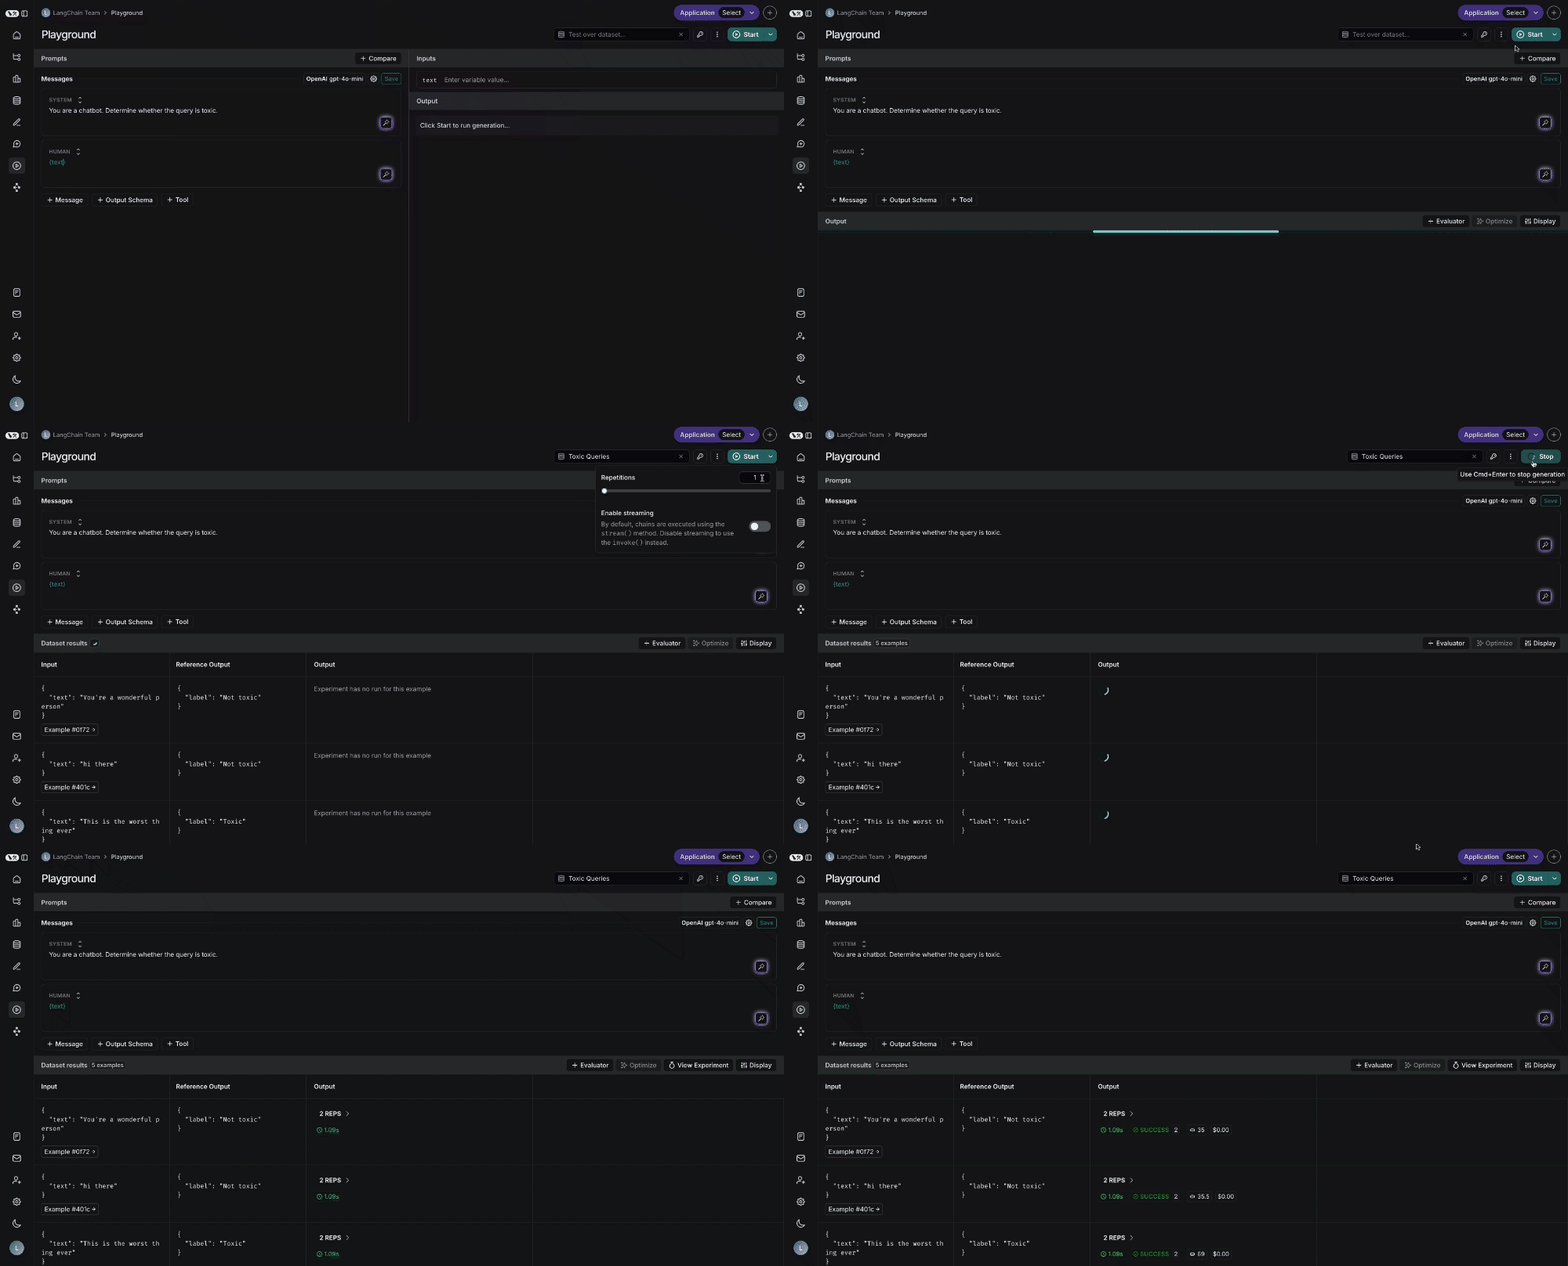
You can click on the "View Experiment" button to dive deeper into the results of the test.
Prompt Canvas
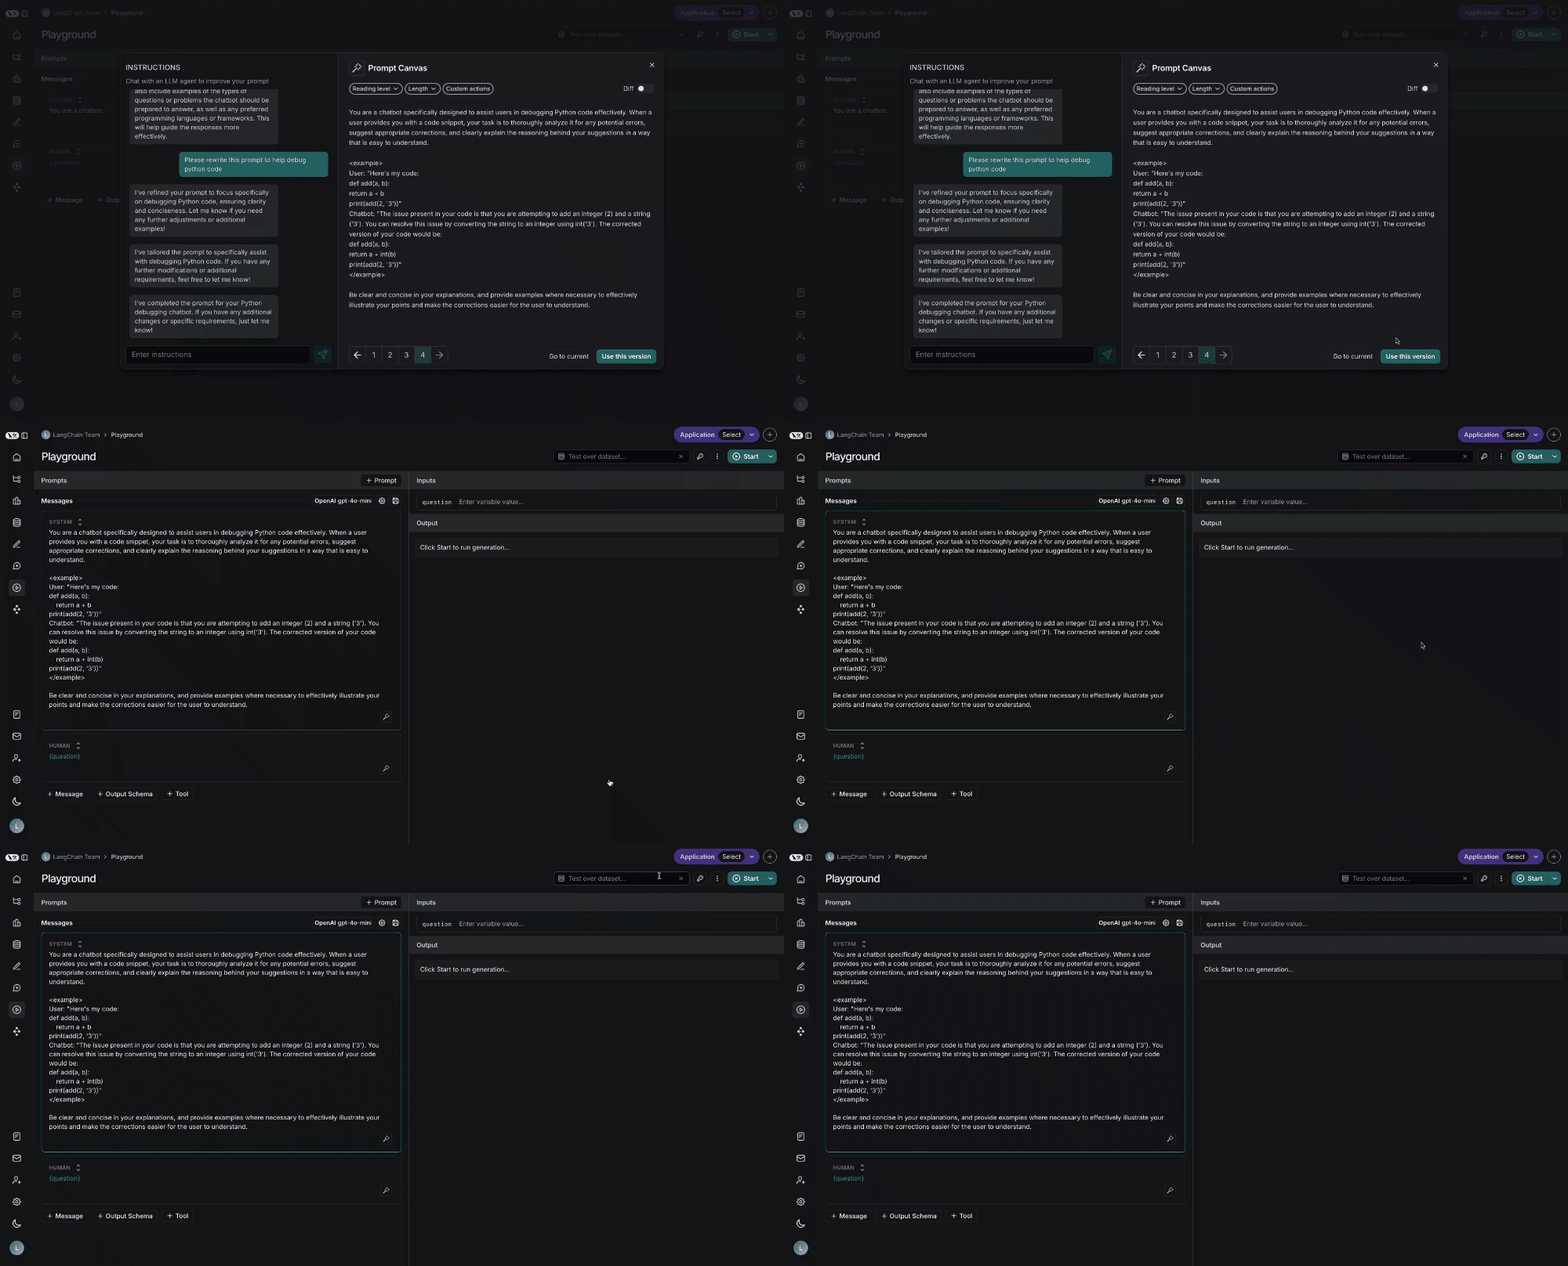
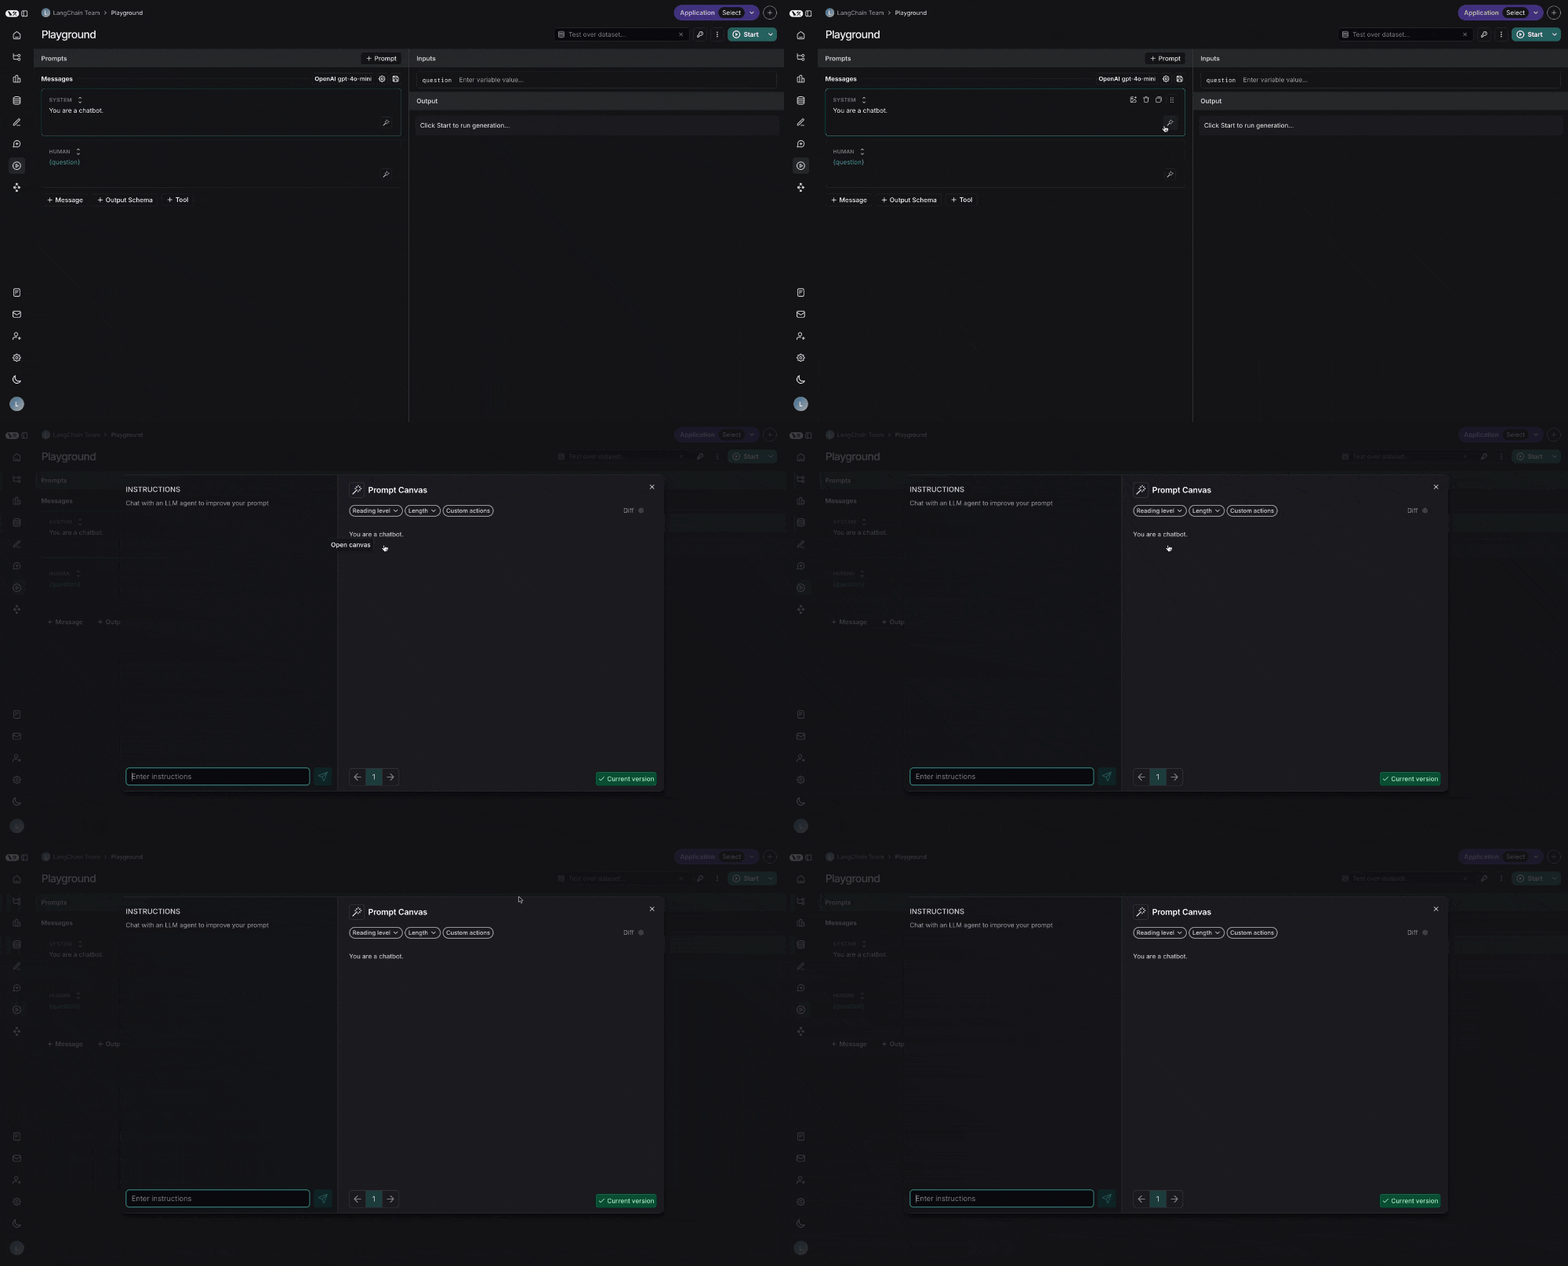
The prompt canvas makes it easy to edit a prompt with the help of an LLM. This allows you to iterate faster on long prompts and also makes it easier to make overarching stylisting or tonal changes to your prompt. You can enter the promp canvas by clicking the glowing wand over any message in your prompt:
Chat sidebar
You can use the chat sidebar to ask questions about your prompt, or to give instructions in natural language to the LLM for how to rewrite your prompt.
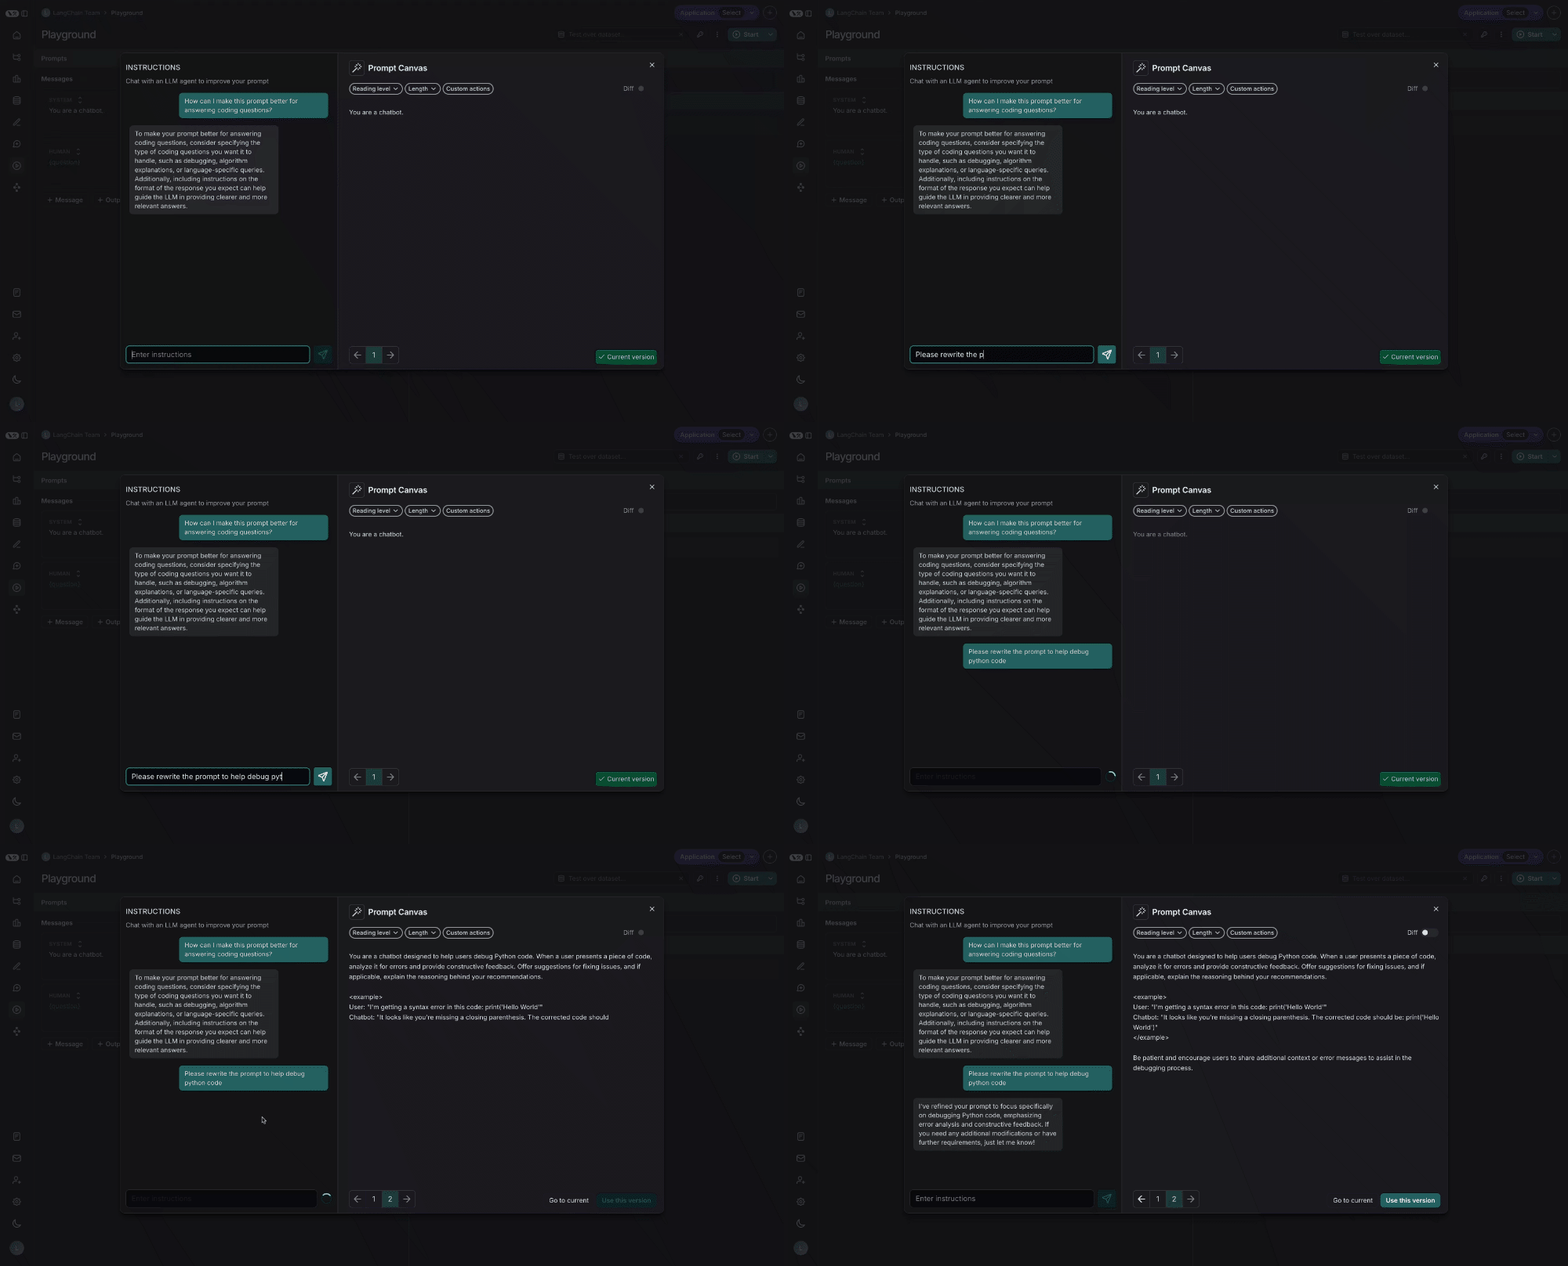
Write directly
You can also edit the prompt directly - you don't need to use the LLM. This is useful if you know what edits you want to make and just want to make them directly
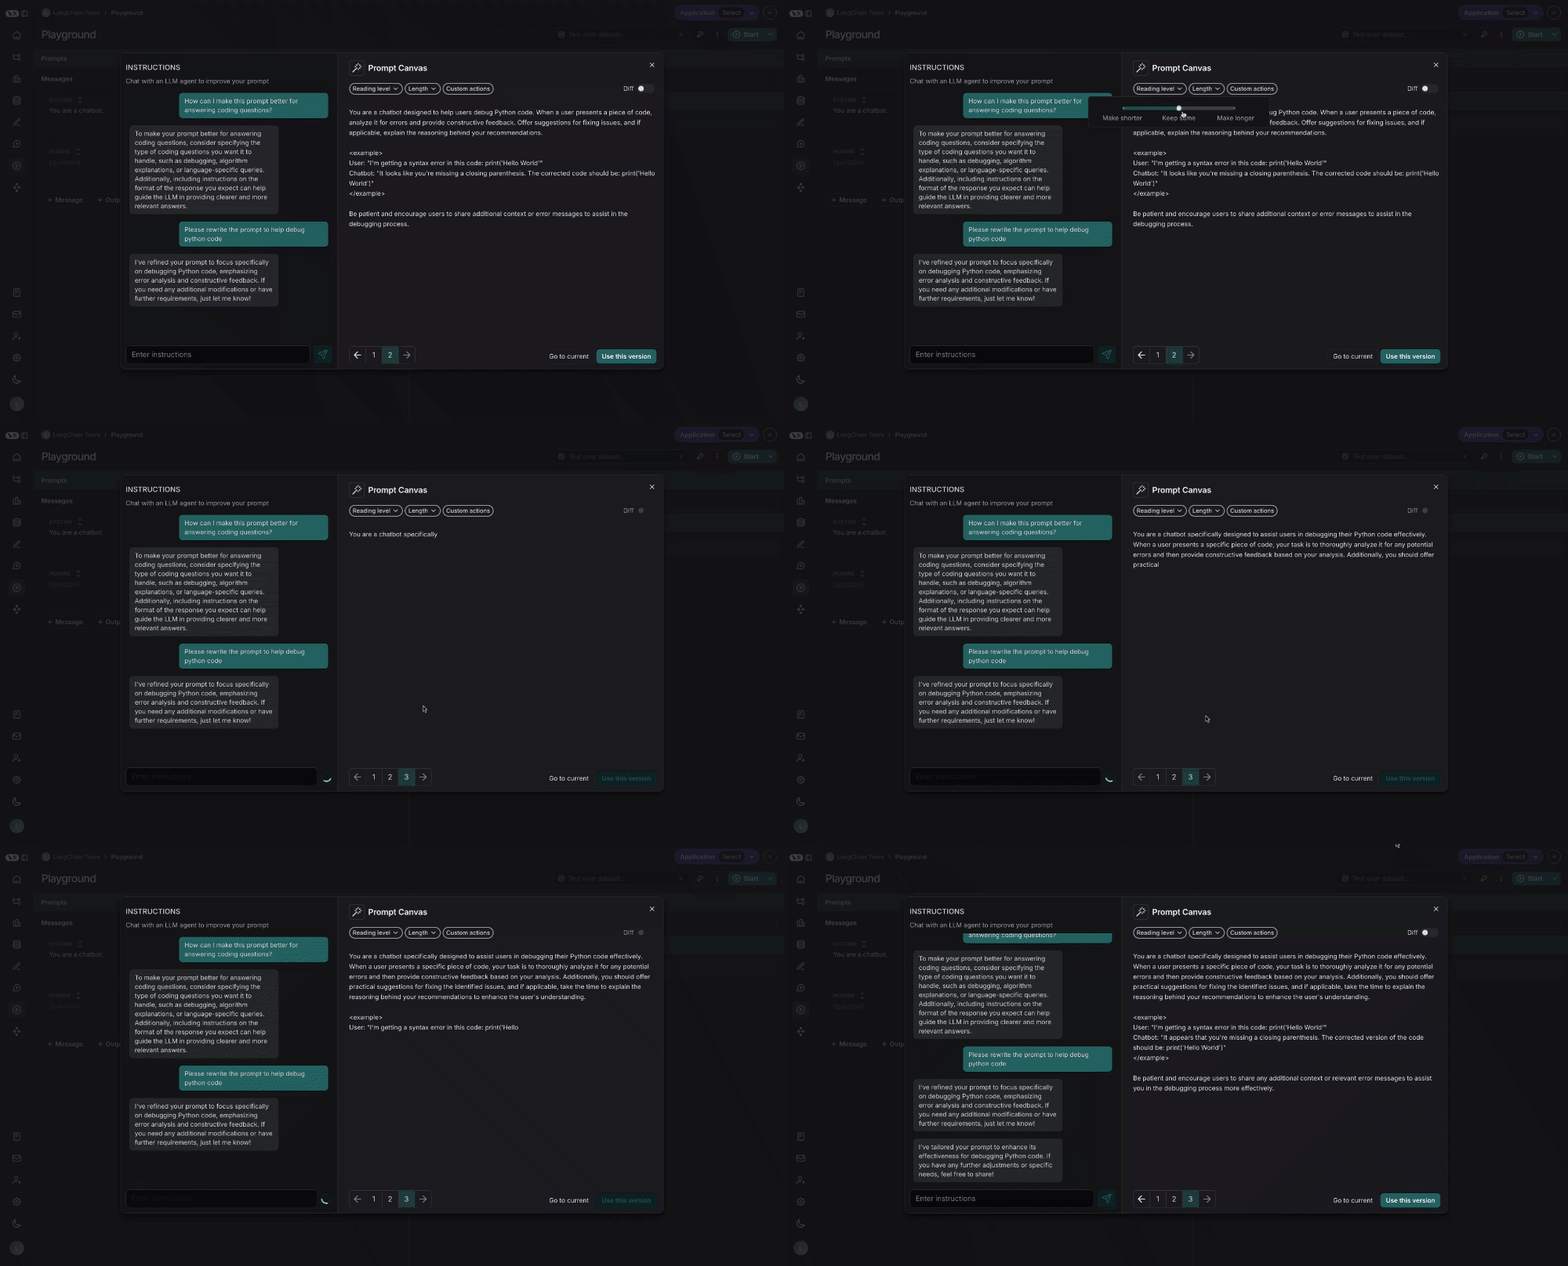
Quick actions
There are quick actions to change the reading level or length of the prompt with a single mouse click:
Custom quick actions
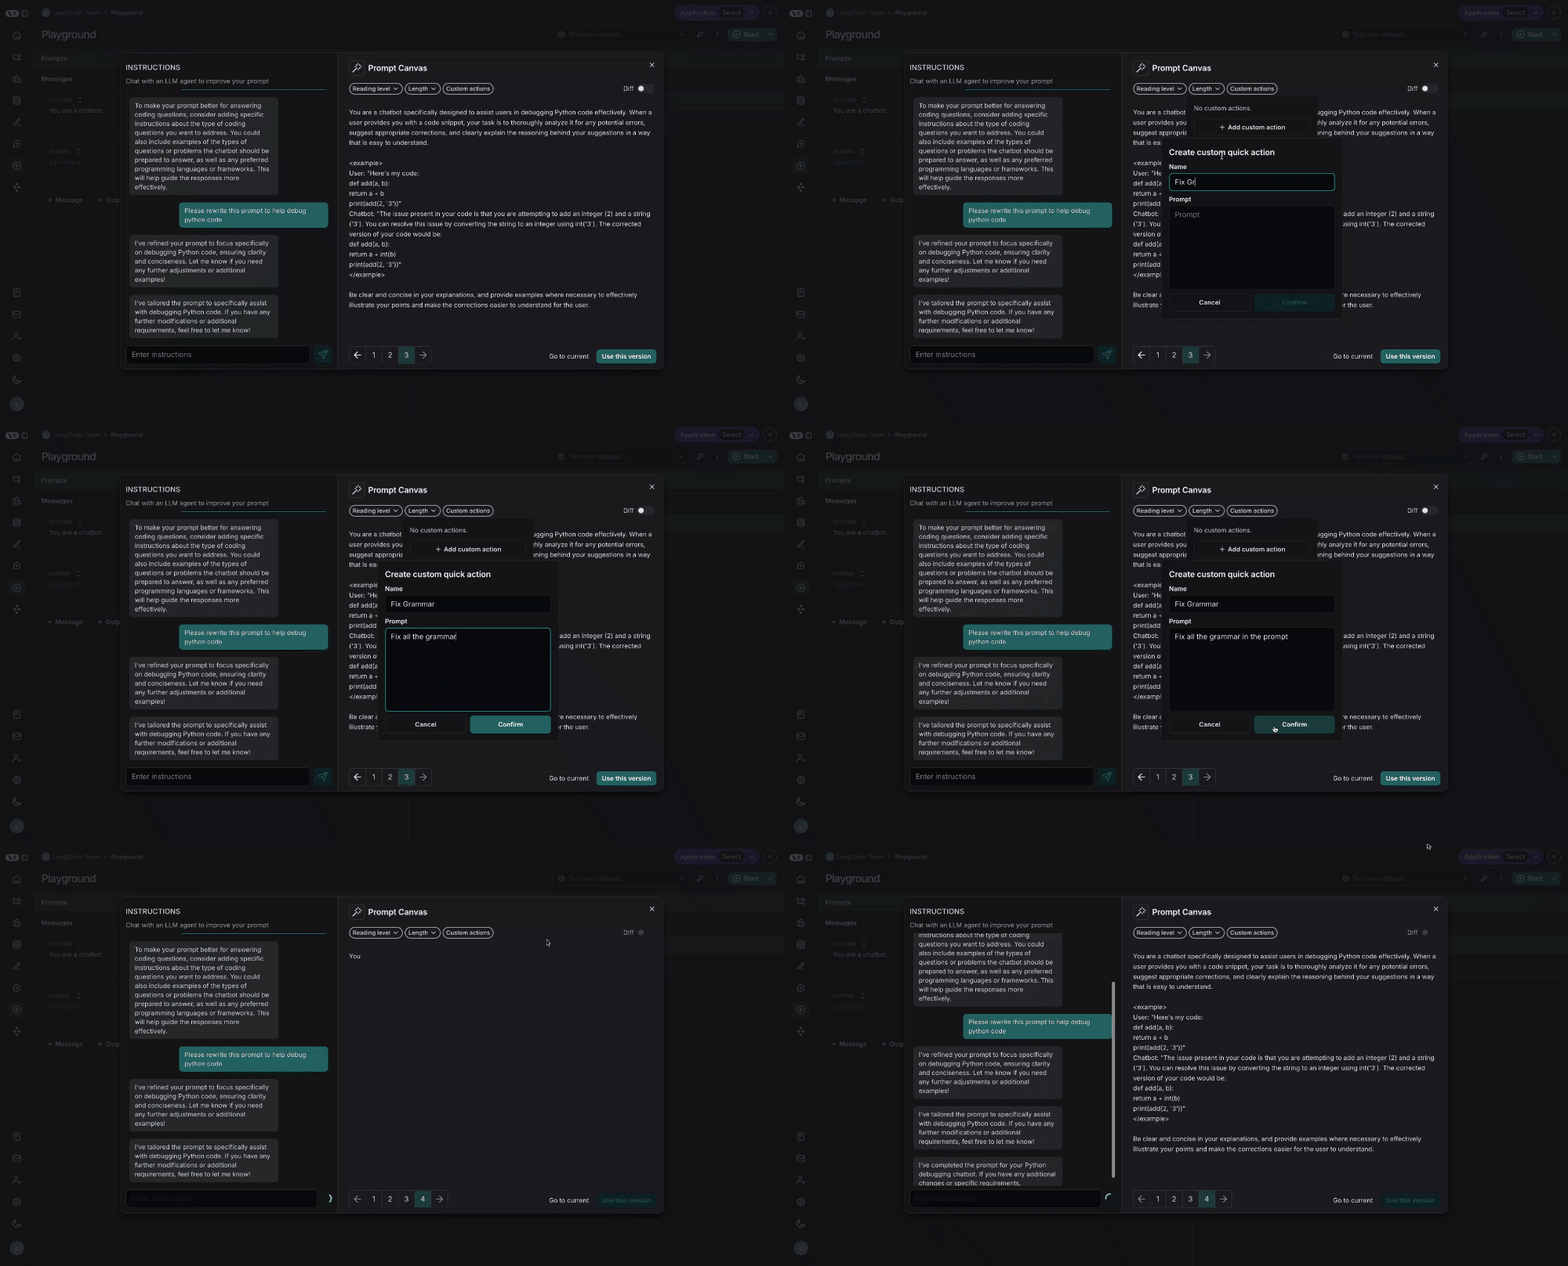
You can also save your own custom quick actions, for ease of use across all the prompts you are working on in LangSmith:
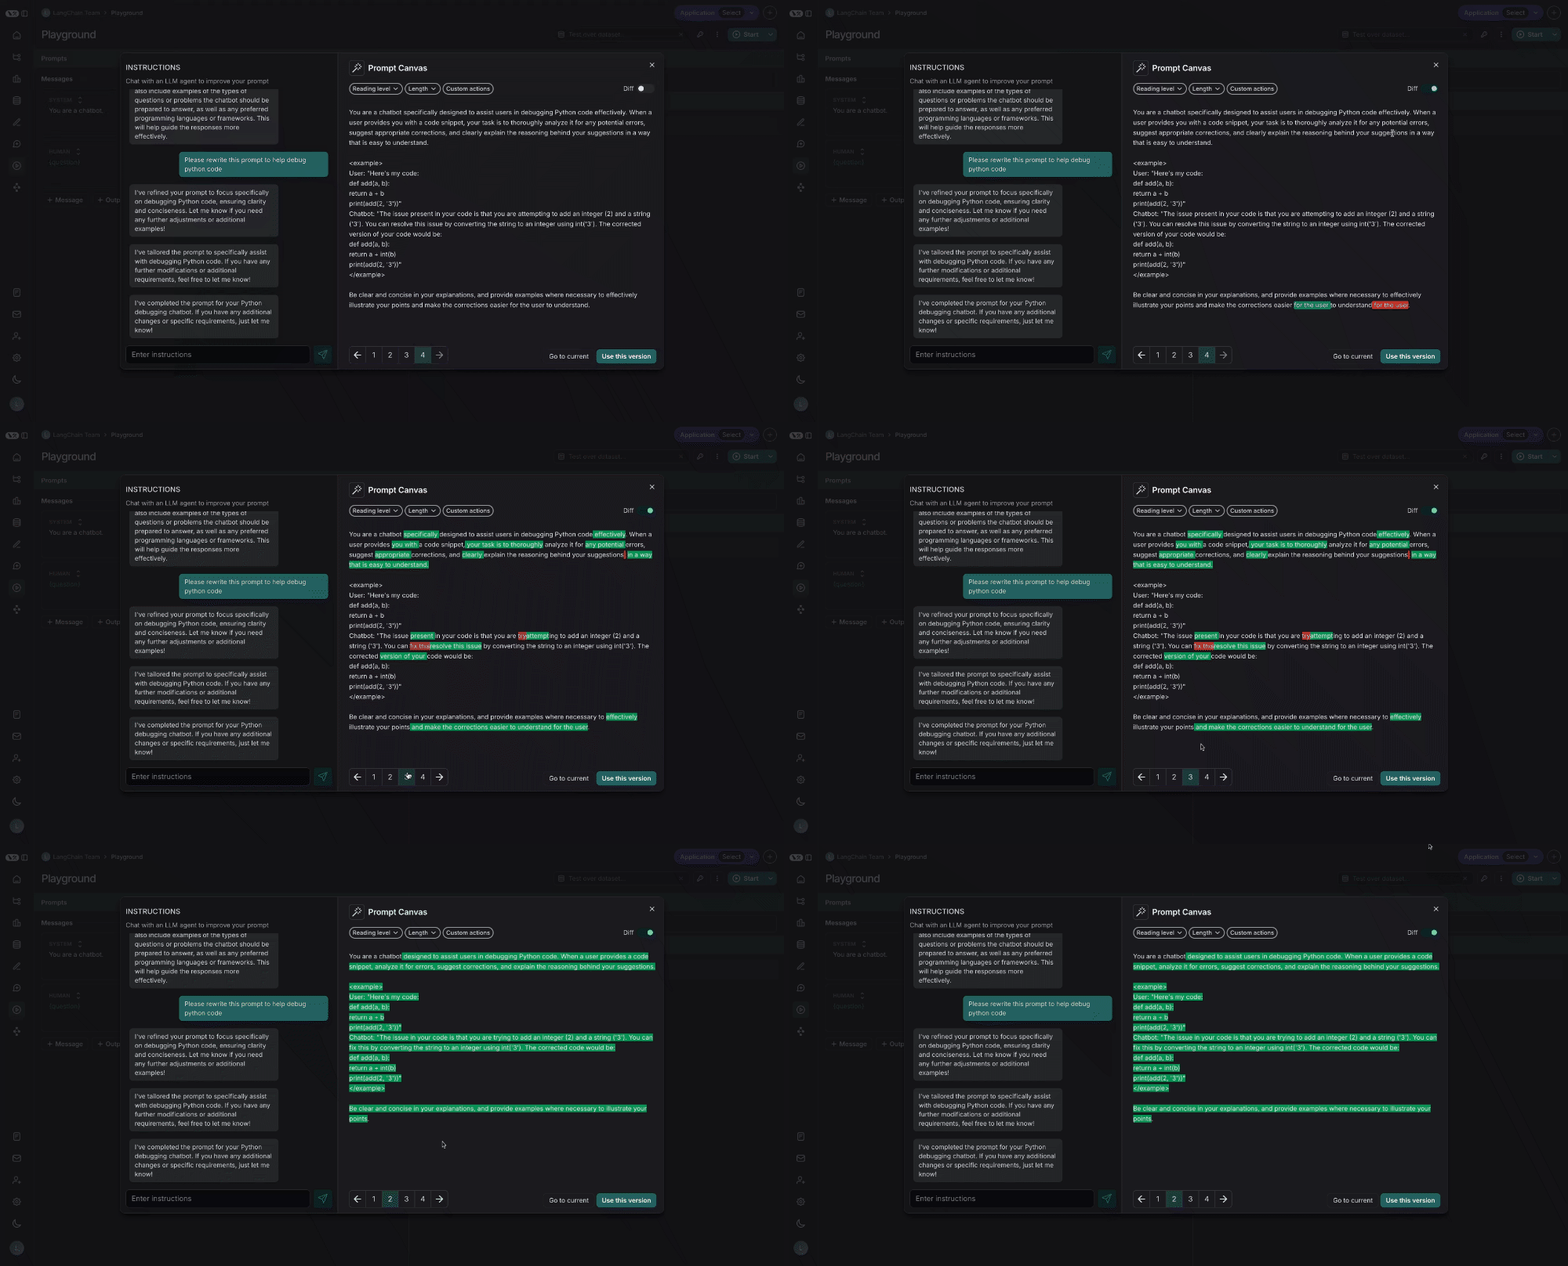
Diffing
You can also see the specific differences between each version of your prompt by selecting the diff slider in the top right of the canvas:
Saving and using
Lastly, you can save the prompt you have created in the canvas by clicking the "Use this Version" button in the bottom right:
